
centos7 安装部署Apache
Apache服务常见操作:
启动:service httpd start
停止:service httpd stop
重新启动:service httpd restart
查询状态:service httpd status
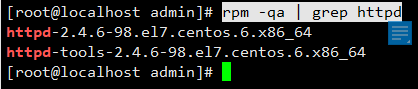
查看是否有旧版本的Apache服务
查看是否有旧版本的Apache服务,如果有就卸载了
查看命令:
rpm -qa | grep httpd![]()
安装Apache服务
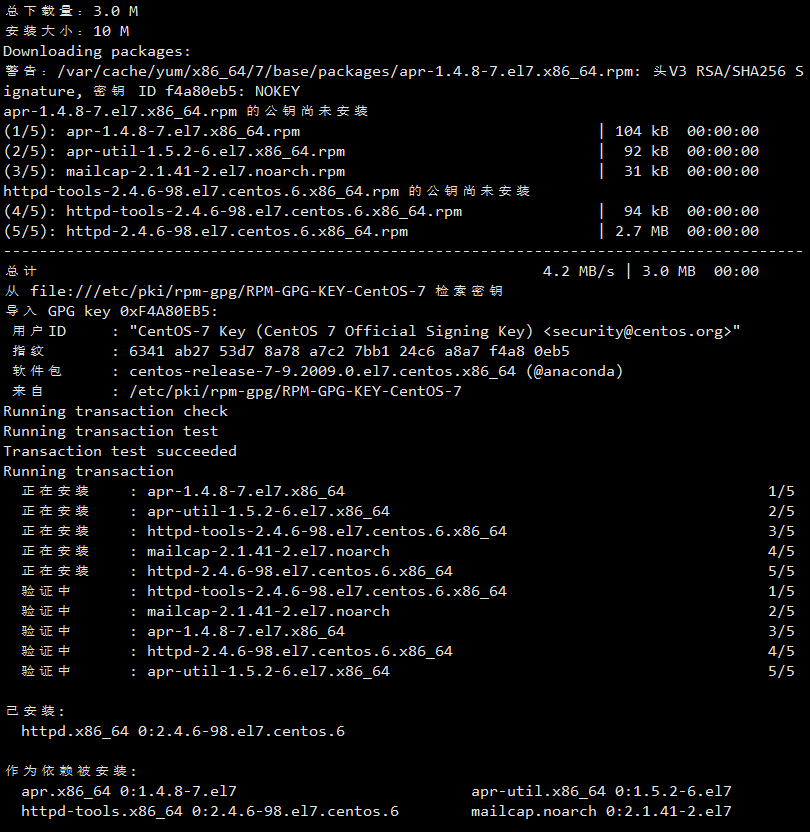
yum install -y httpd
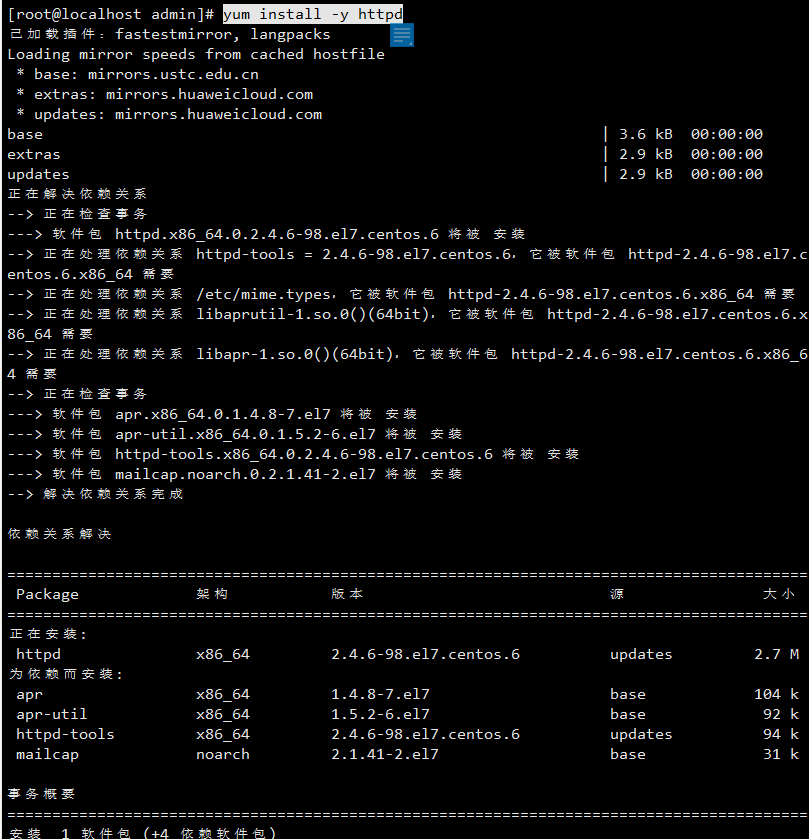
安装速度很快,5秒左右。再次查看是否安装Apache
安装成功
查看Apache服务是否启动成功:
ps -aux | grep httpd![]()
查询Apache服务状态
方式1:
service httpd status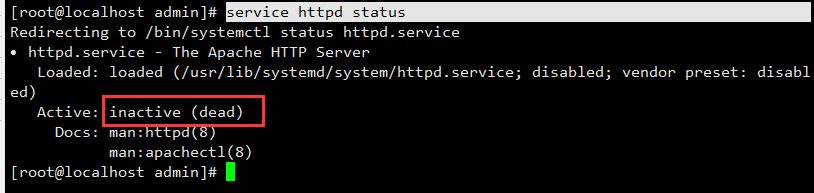
说明未启动服务
方式2:
systemctl status httpd.service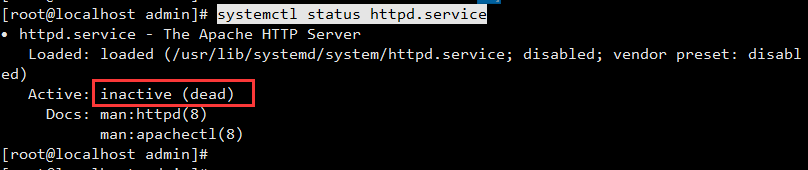
事实上,方式1中就是直接跳转到这个命令的,如下:

启动Apache服务
service httpd start
再次查看是否启动成功:
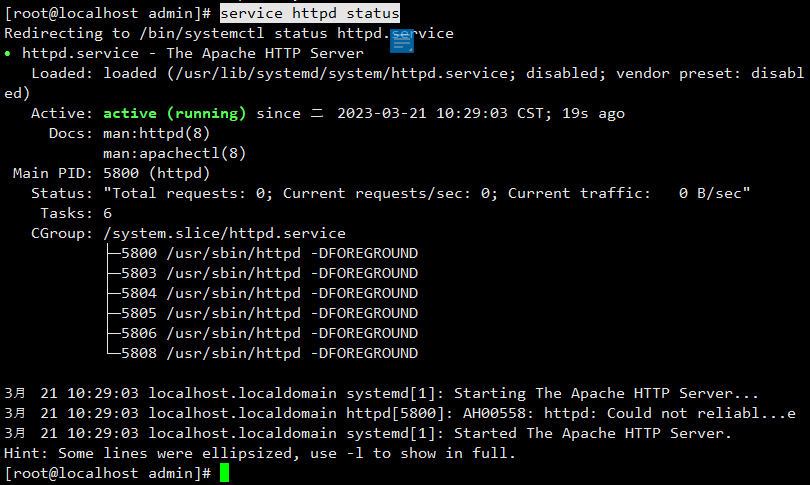
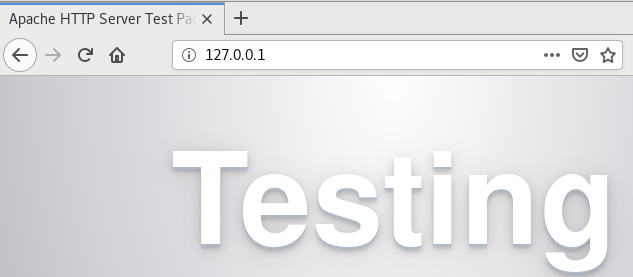
可见,Apache服务已启动。
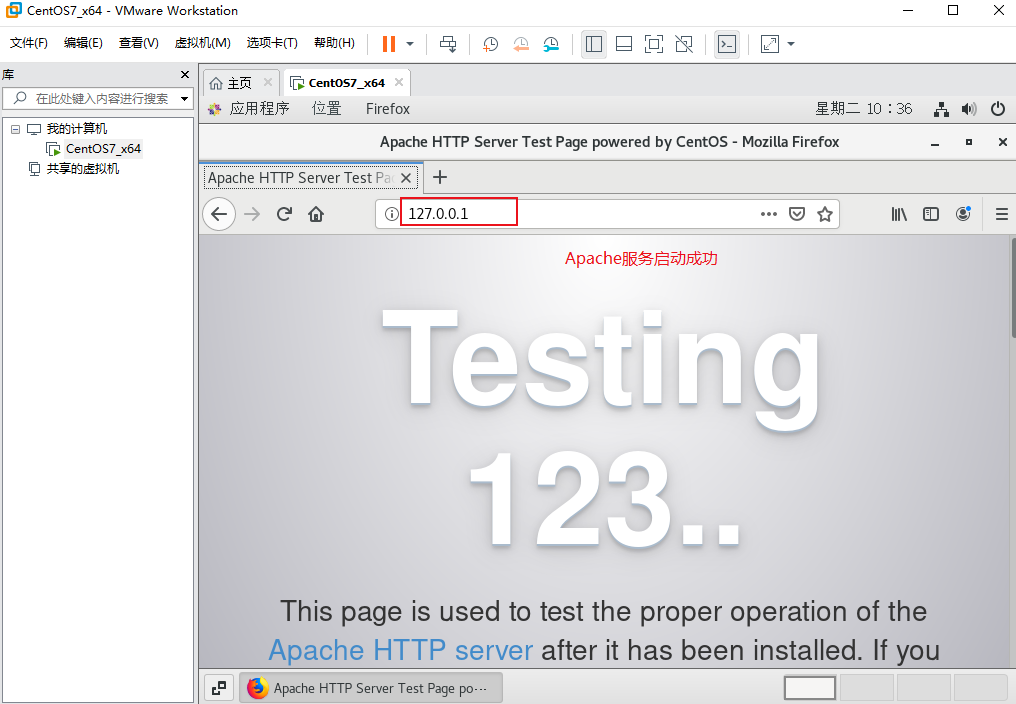
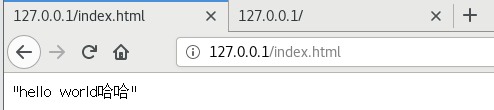
在浏览器中输入:http://127.0.0.1/ ,可以正常访问页面了
重启Apache服务
service httpd restart 
停止Apache服务
service httpd stop 
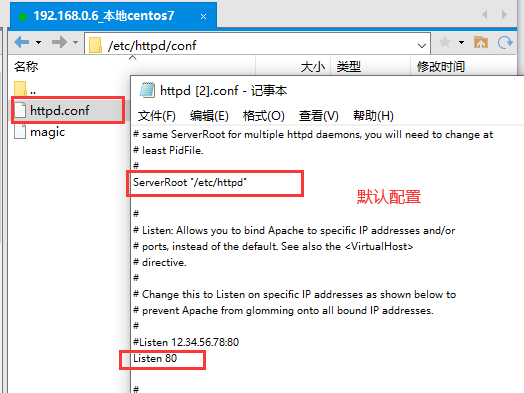
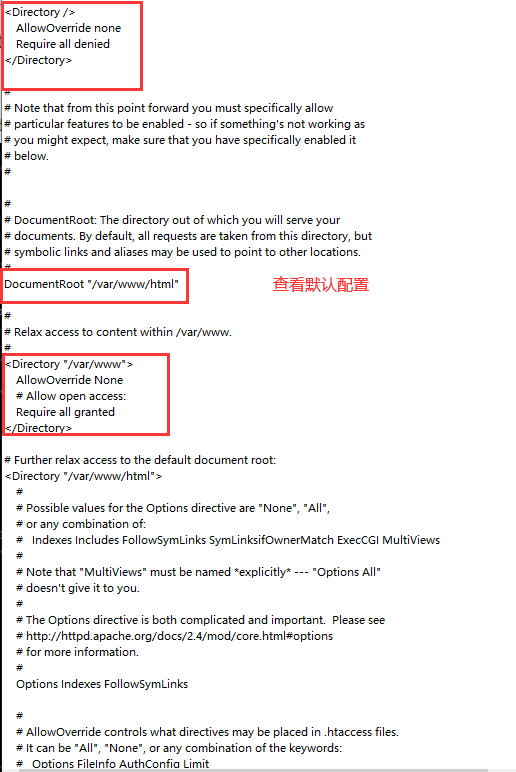
查看Apache配置文件httpd.conf
默认配置文件路径:/etc/httpd/conf
cat /etc/httpd/conf/httpd.conf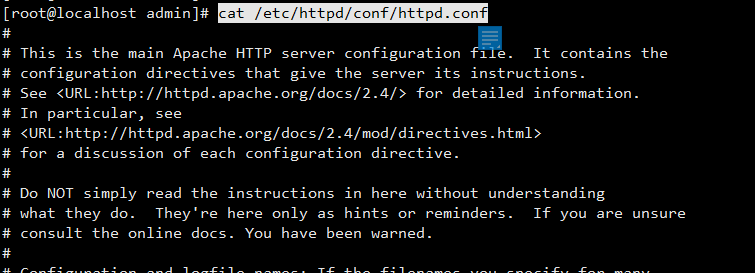
注意:
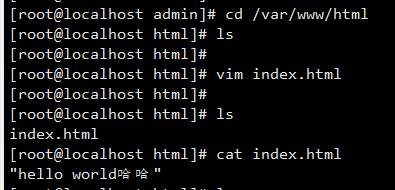
1、我们此时进入到 /var/www/html会发现并没有index.html文件 :
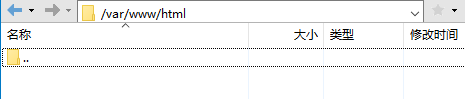
事实上,如果该目录是空目录,则显示默认的“Testing 123...”页面;如果该目录里面有自己新建的index.html,则显示该index.html页面。
2、不能手动新建index.html,或者直接上传index.html页面到xftp的/var/www/html目录下,会提示以下报错:
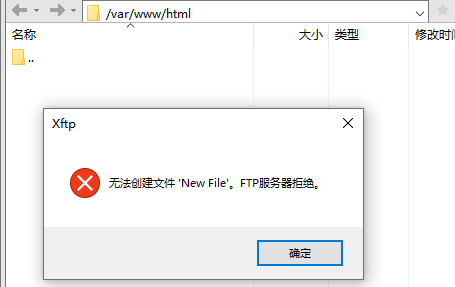
可以通过在xshell中以管理员身份通过vim的方式新建index.html
查看80端口占用情况
netstat -an|grep :80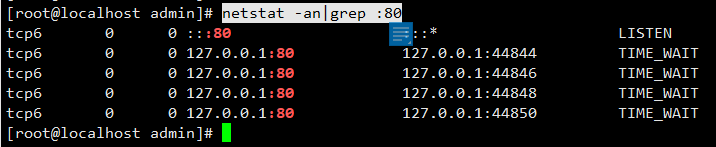
设置Apache服务开机自启
systemctl enable httpd
检查Apache是否已经安装了开机自启
systemctl list-unit-files | grep httpd
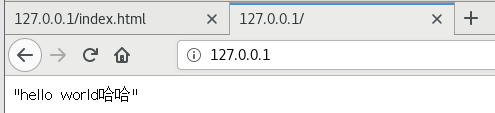
设置后,重启虚拟机,访问127.0.0.1成功
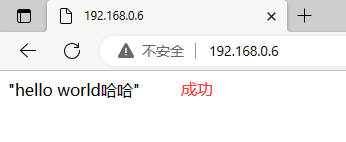
在其他电脑访问
需要手动开放防火墙的80端口。
查看防火墙端口开放情况
firewall-cmd --list-ports
防火墙开启centos7的80端口
firewall-cmd --zone=public --add-port=80/tcp --permanent
重启防火墙
firewall-cmd --reload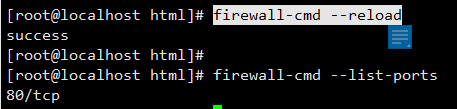
此时在其他电脑上访问:http://192.168.0.6/
修改端口
将默认的80端口修改为8081
注意:不能直接用记事本编辑httpd.conf,否则保存关闭后,再次打开该文件,会发现并没有修改成功,还是原来的80端口
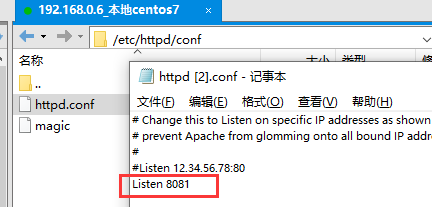
需要用vim来编辑:(执行以下命令后,输入 i 进行键盘上下左右键移动,编辑后,按ESC键,并输入 :wq 并按enter键即可保存退出)
vim /etc/httpd/conf/httpd.conf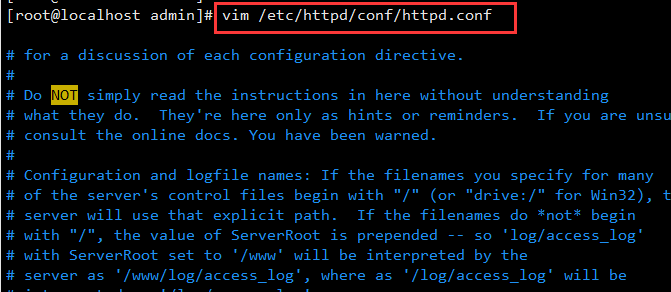
发现虽然可以修改端口,但重启Apache报错了

Job for httpd.service failed because the control process exited with error code. See "systemctl status httpd.service" and "journalctl -xe" for details.
有待解决的问题
1、修改默认的80端口
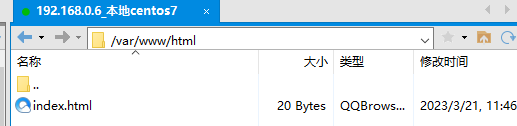
2、上传静态文件到Apache的静态资源目录:/var/www/html 。